__________
The basement is 9' long x 4' wide. x 12" deep. This posses a bit of a problem when it comes to the next step which is cutting and building the sleeping deck or floor of the mini. Back in the post called "On Our Own Terms" I mentioned that we currently sleep in a queen size bed. This means that the sleeping deck needs to be a finished 5' wide. Well, 3/4" plywood does not come 5' wide. In this case, "a bit of a problem" translate to costs a little more money because I needed to purchase two more pieces of 3/4" plywood and cut them to the length I needed. NOT TO WORRY though, you will find a use the 3' x 4' cut off elsewhere. You will actually be glad you have those pieces.
 |
| This is the first piece of 4' x 5' 2" sleeping deck. The view is from the front or tow end of the mini. |
 |
| This is the second piece of 4' x 5' 2" sleeping deck. Same view as above. |
__________
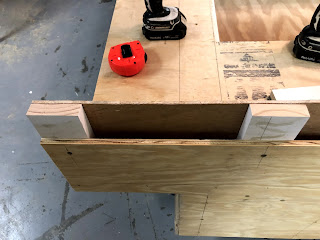
In the photos below I have made a model of the exterior 1/2" wall, the 1/4" interior wall, the 3/4" white primed stud and the 3/4" x 2" wall base plate. This model allows me to move it around the edges of the sleeping deck to check alignments and make certain that things stay square. The few minutes it took to build the model has proved to be an invaluable tool.
 |
| This is the model being used at the rear (galley end / passenger side). |
__________
The next step was cutting in the two hatches to gain access into the mini's basement storage area through the sleeping deck. This needs to be precise and follow the framework or floor joice if you will. Doing so allowed me to head off the opening between and around the joice so the hatches do not fall through.
 |
| I screwed these pieces of 1/2" scrap plywood in place so as I cut the hatch opening the 3/4" plywood would not get in a bind or fall into the basement. |
In the photo above you can see how I headed off the opening so the piece of sleeping deck that I cut out fits back into the opening for a nice sturdy deck.
__________
__________
These two access points will also allow us to set up a removable table pedestal down onto the basement floor and sit on the edge of the opening with our feet on the basement floor. We can use the table to eat, play backgammon or use a laptop. You will see more about this as we move forward.
#minicamptrailer #diycamptrailer #1stCutMini-CampTrailers #offroadtrailer


You are very descriptive and make it sound easy. Are you going to publish plans?I’m going to ask my husband to build us one
ReplyDelete